
SLC Smart One S24018 Quick Start Guide
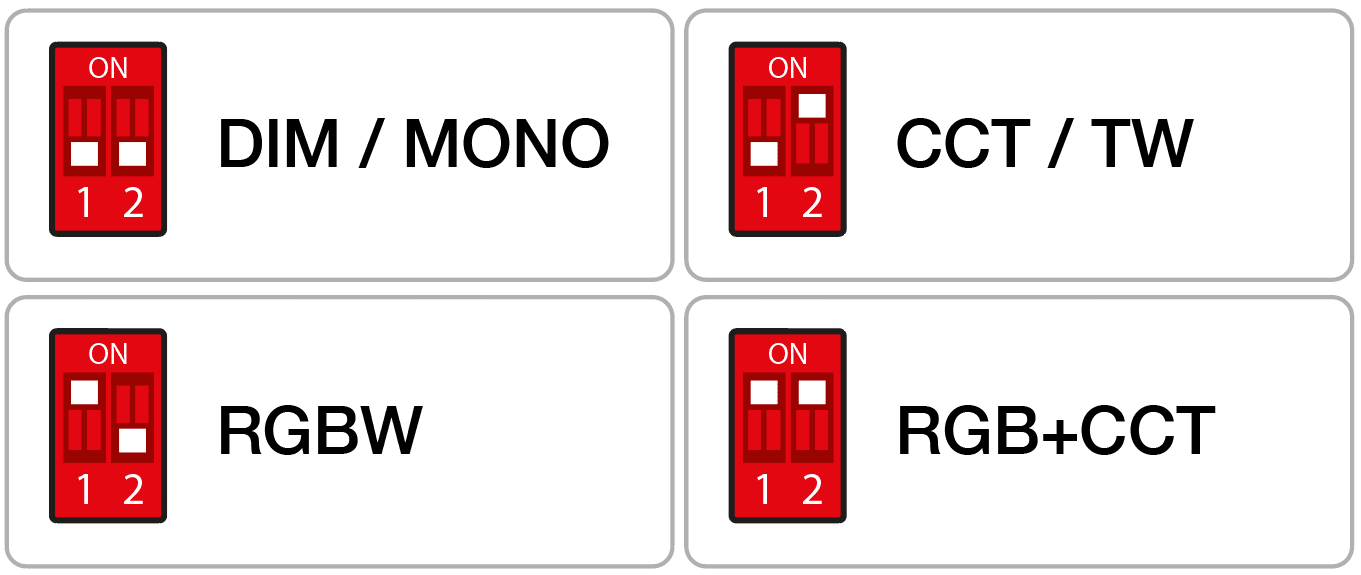
1. Set the Controller in the correct colour mode
2. Connect the SmartOne PSU to a Zigbee Smart Hub
3. TouchLink to a Zigbee Remote
4. Reset to Factory settings
5. Wiring Diagram
Set the Controller in the correct colour mode
Zigbee Network pairing through a Zigbee Gateway/Hub

1. Choose to add a new light from your compatible Zigbee Hub Interface. Your interface is now searching for new Zigbee devices on the network.
2. Press the programming button 5 times on the SmartOne Controller.
3. The Controller will turn up in your Hub Interface.
Troubleshooting:
1. Try step 1-3 again
2. Reset the SmartOne Controller to factory settings (Step 2), and then try step 1-3 again.
TouchLink to a Zigbee Lighting Device

1. Press the programming button on the SmartOne Controller 4 times.
2. Bring the remote close and begin TouchLink pairing.
The lights will blink to confirm a sucsessful pair.
Troubleshooting:
1. Factory reset the remote, see user manual. (SmartOne Remotes: Quick Guides).
2. Try step 1-2 again.
Factory reset the SmartOne Controller
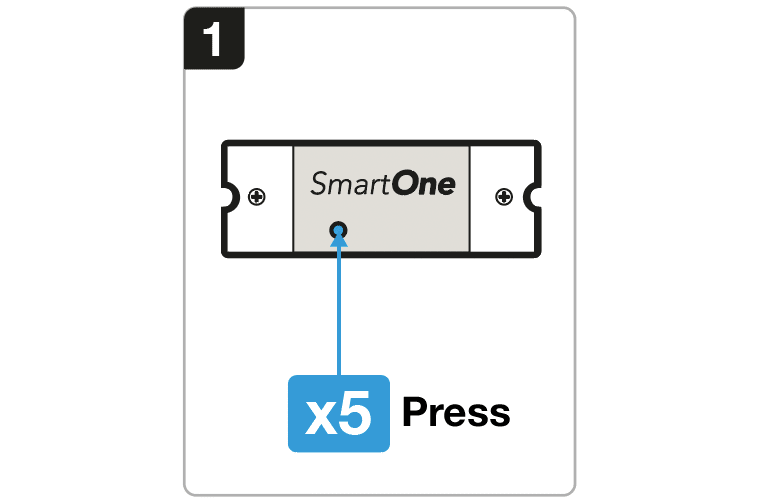
1. Press the programming button on the SmartOne Controller 5 times.
Note: This will erase all bindigs to the device and start pairing mode. (15 seconds timeout).
Wiring Diagram